Key Takeaways Table
| Benefit | Detail |
|---|---|
| Time to Complete | 5–15 minutes |
| Cost | $10–$30 for most standard filters |
| Skill Level | Beginner-friendly DIY |
| Tools Needed | Screwdriver (maybe), gloves, new filter |
| Replacement Frequency | Every 12,000–15,000 miles or yearly |
Why Replace Your Cabin Air Filter?
Your cabin air filter traps dust, pollen, smog, and other airborne particles, keeping your car’s interior clean and breathable. Over time, the filter becomes clogged, which can lead to:
- Unpleasant odors
- Reduced airflow from vents
- Increased strain on your HVAC system
- Worsened allergies or respiratory irritation
Most manufacturers recommend replacing it every 12,000 to 15,000 miles or at least once a year. However, if you live in a dusty area or drive frequently in traffic, you might need to replace it more often.
Tools & Materials Needed
You won’t need much to get started:
- A compatible cabin air filter (check your owner’s manual or parts store)
- A screwdriver or socket wrench (if needed to remove panels)
- A vacuum to clean out the filter compartment (optional but helpful)
- Gloves and a dust mask if you’re sensitive to dirt or allergens
Step-by-Step: Cabin Air Filter Replacement

Step 1: Park Safely and Prepare
- Turn off your car and set the parking brake.
- Open your glove box and empty the contents.
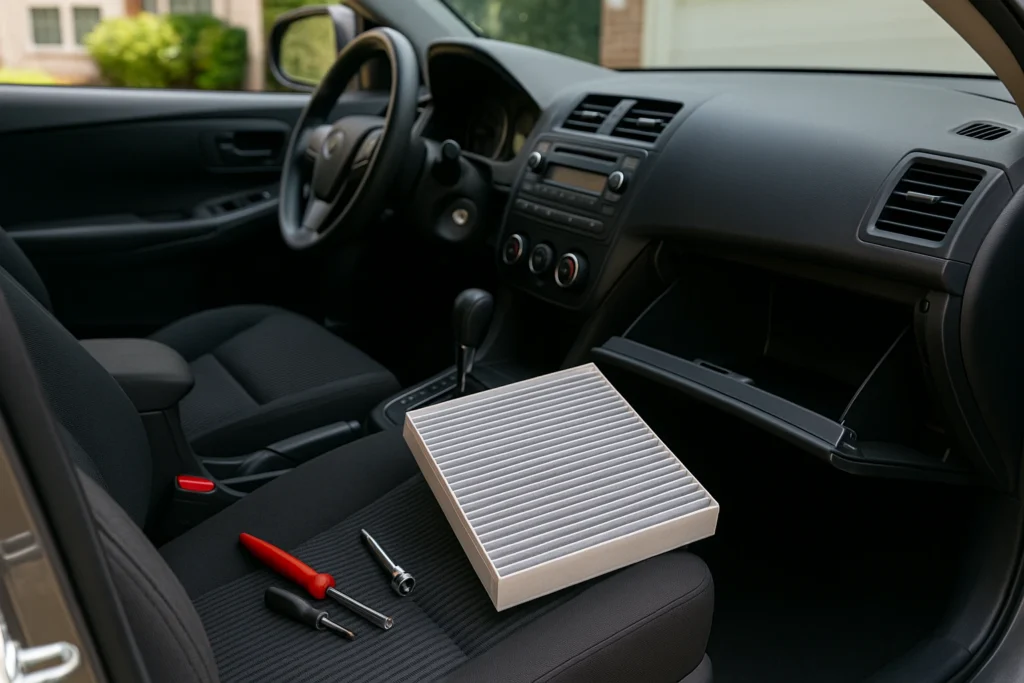
Step 2: Locate the Filter Compartment
- Most cabin filters are located behind the glove box.
- Squeeze the sides of the glove box or remove the damper arm and tabs to drop it fully.
Step 3: Remove the Old Filter
- Find the access panel or cover. It may have tabs or screws.
- Remove the cover and slide out the old cabin air filter.
- Take note of the airflow direction arrows before removal.
Step 4: Clean the Housing
- Use a handheld vacuum to remove any dust, leaves, or debris inside the filter compartment.
Step 5: Insert the New Filter
- Insert the new filter, aligning the airflow arrows in the same direction.
- Replace the access panel securely.
Step 6: Reassemble the Glove Box
- Reattach the glove box stops or damper.
- Close it up, and you’re done!
Tips and Troubleshooting
- If your glove box won’t lower, check for side clips or a damper arm.
- If your vehicle’s filter is under the hood, consult your manual—it will often be near the windshield.
- Write the date and mileage of your replacement on the filter or in your maintenance log.
- If your old filter looks very dirty or has mold, consider changing it more frequently.

Conclusion
Replacing your cabin air filter is one of the easiest ways to maintain your car and improve your driving experience. It takes minutes, costs very little, and can make a big difference in air quality.
Need help finding the right filter? Check out our full selection of cabin air filters on 24k Auto Parts and get the right fit for your vehicle.
FAQs about Replacing Cabin Air Filter
How do I know when my cabin air filter needs replacing?
Look for signs like weak airflow from your vents, musty or moldy smells inside the cabin, or visible debris when inspecting the filter. You may also feel allergy symptoms worsening while driving.
Can I replace the cabin air filter myself?
Yes! This is a simple DIY job that usually takes under 15 minutes. Most vehicles require only basic tools, and you’ll find the filter behind the glove box or under the hood.
What happens if I don’t replace the cabin air filter?
A dirty cabin air filter can reduce airflow, strain your HVAC system, trap odors, and worsen interior air quality. Over time, this can lead to higher energy use and discomfort while driving.