📈 Key Takeaways
| Topic | Summary |
|---|---|
| Why Bleed Brakes | Removes air from lines for firmer pedal and better stopping power |
| Tool Needed | Brake bleeder kit (manual, vacuum, or pressure types) |
| Time Needed | 30–60 minutes |
| Safety Tips | Use gloves, eye protection, and prevent brake fluid spills |
| Maintenance Frequency | Every 2–3 years or after brake system work |
✨ Why Brake Bleeding Matters
When air gets trapped in your brake lines, it compresses during braking, making your pedal feel soft or spongy. This reduces stopping power and creates a safety hazard. Bleeding your brakes removes air bubbles and old fluid, restoring reliable braking performance.
A brake bleeder kit makes this job easy to do solo, eliminating the need for a helper to pump the pedal.
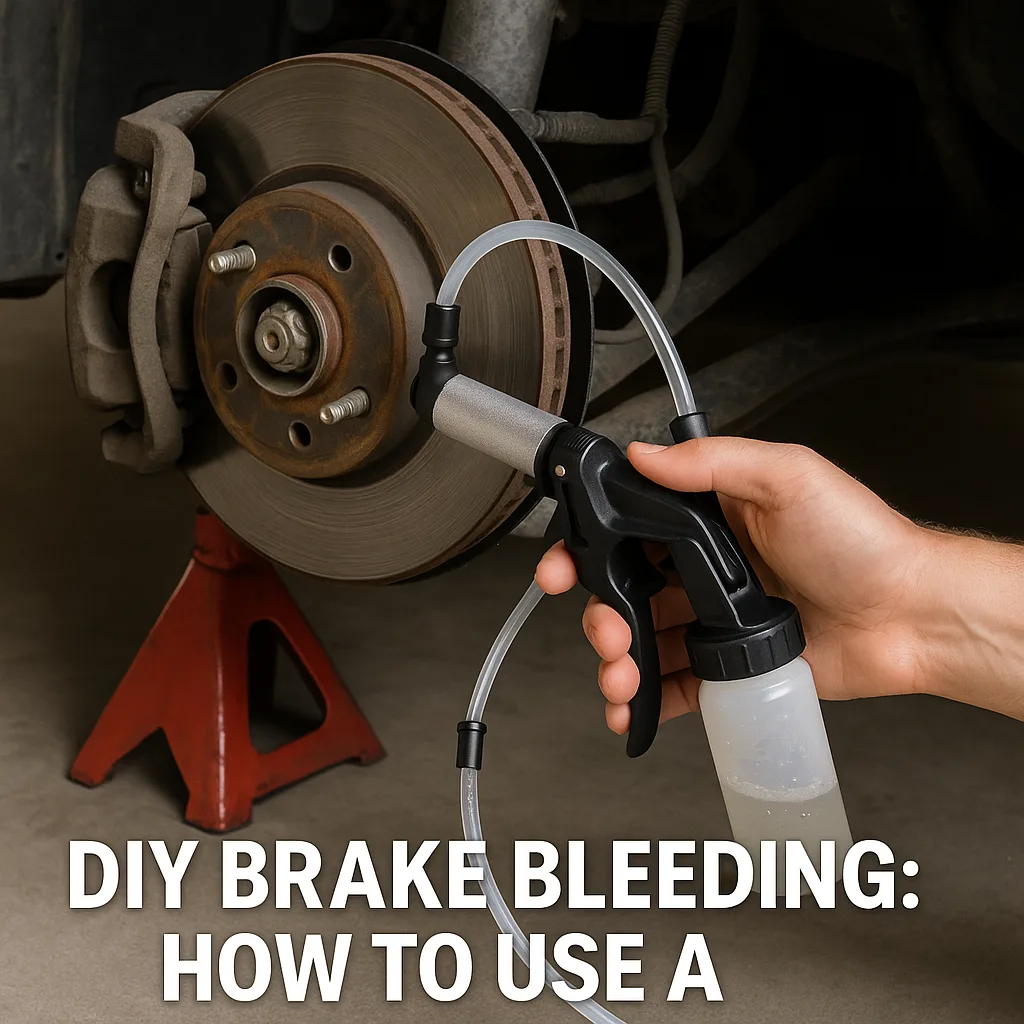
🪜 How a Brake Bleeder Kit Works
Brake bleeder kits function by either:
- Creating suction (vacuum) to pull fluid through the system
- Applying pressure to push fluid from the master cylinder to the calipers
Most kits include tubing, adapters, a reservoir, and a hand pump or pressure tank.
Types of Brake Bleeder Kits
- Manual Kits: Hand-operated, low-cost, often requires two people
- Vacuum Kits: One-person use; uses suction to draw fluid and air out
- Pressure Kits: One-person use; pushes new fluid through the system
- One-Person Kits: Typically include one-way valves for solo bleeding
✅ DIY Brake Bleeding Instructions
⚡ Step 1: Prep Your Vehicle
- Park on a flat surface
- Jack up the car and use jack stands
- Remove wheels for access
- Open the brake fluid reservoir and check fluid type (DOT 3, 4, etc.)

⚖️ Step 2: Setup the Brake Bleeder Kit
- Attach tubing to the bleeder valve (start with the wheel farthest from the master cylinder)
- Connect the other end to the collection reservoir or vacuum pump
- Make sure all connections are tight to prevent air entry
⚙️ Step 3: Bleed the Brakes
- Vacuum Kit: Pump to create suction, then open bleeder valve
- Pressure Kit: Pressurize master cylinder reservoir, then open bleeder
- Watch for air bubbles in the tube; continue until fluid runs clear
- Top off brake fluid as needed to prevent air from re-entering

🔧 Step 4: Repeat for Each Brake
Follow this order unless your vehicle specifies otherwise:
- Rear passenger
- Rear driver
- Front passenger
- Front driver

🌟 Step 5: Final Checks
- Ensure all bleeder screws are closed
- Refill reservoir to “MAX” line
- Reinstall wheels and torque properly
- Pump the brake pedal to check firmness
- Perform a low-speed brake test in a safe area
⚠️ Mistakes to Avoid
- Letting reservoir run dry → introduces air
- Wrong brake fluid type → can damage seals
- Over-tightening bleeder screws → risk of snapping
- Bleeding in wrong order → ineffective bleed
- Not using safety gear → risk of injury from fluid
🌿 Product Spotlight: Mityvac MV8000 Brake Bleeder Kit
Perfect for DIY use, the Mityvac MV8000 includes:
- Hand pump with pressure gauge
- Fluid reservoir
- Tubing and adapters

This kit allows one-person brake bleeding, making it ideal for home mechanics. It’s reliable, affordable, and compact—a great addition to your garage toolset.
❓FAQs About DIY Brake Bleeding
How often should I bleed my brakes?
Every 2–3 years or after any brake component replacement (calipers, lines, etc.).
What are the signs my brakes need bleeding?
A soft or spongy pedal, longer stopping distance, or recent brake work are all red flags.
Can I bleed brakes alone?
Yes, using a one-person brake bleeder kit. These kits use one-way valves, vacuum, or pressure to simplify the job.